Lucky me, I stumbled upon quite a find on a trip to Duluth, Minnesota with my husband back in July. I really have to thank him since we were just killing time between lunch and the beer festival that brought us up there and he suggested popping into an antique store we passed. And that's where I saw this:

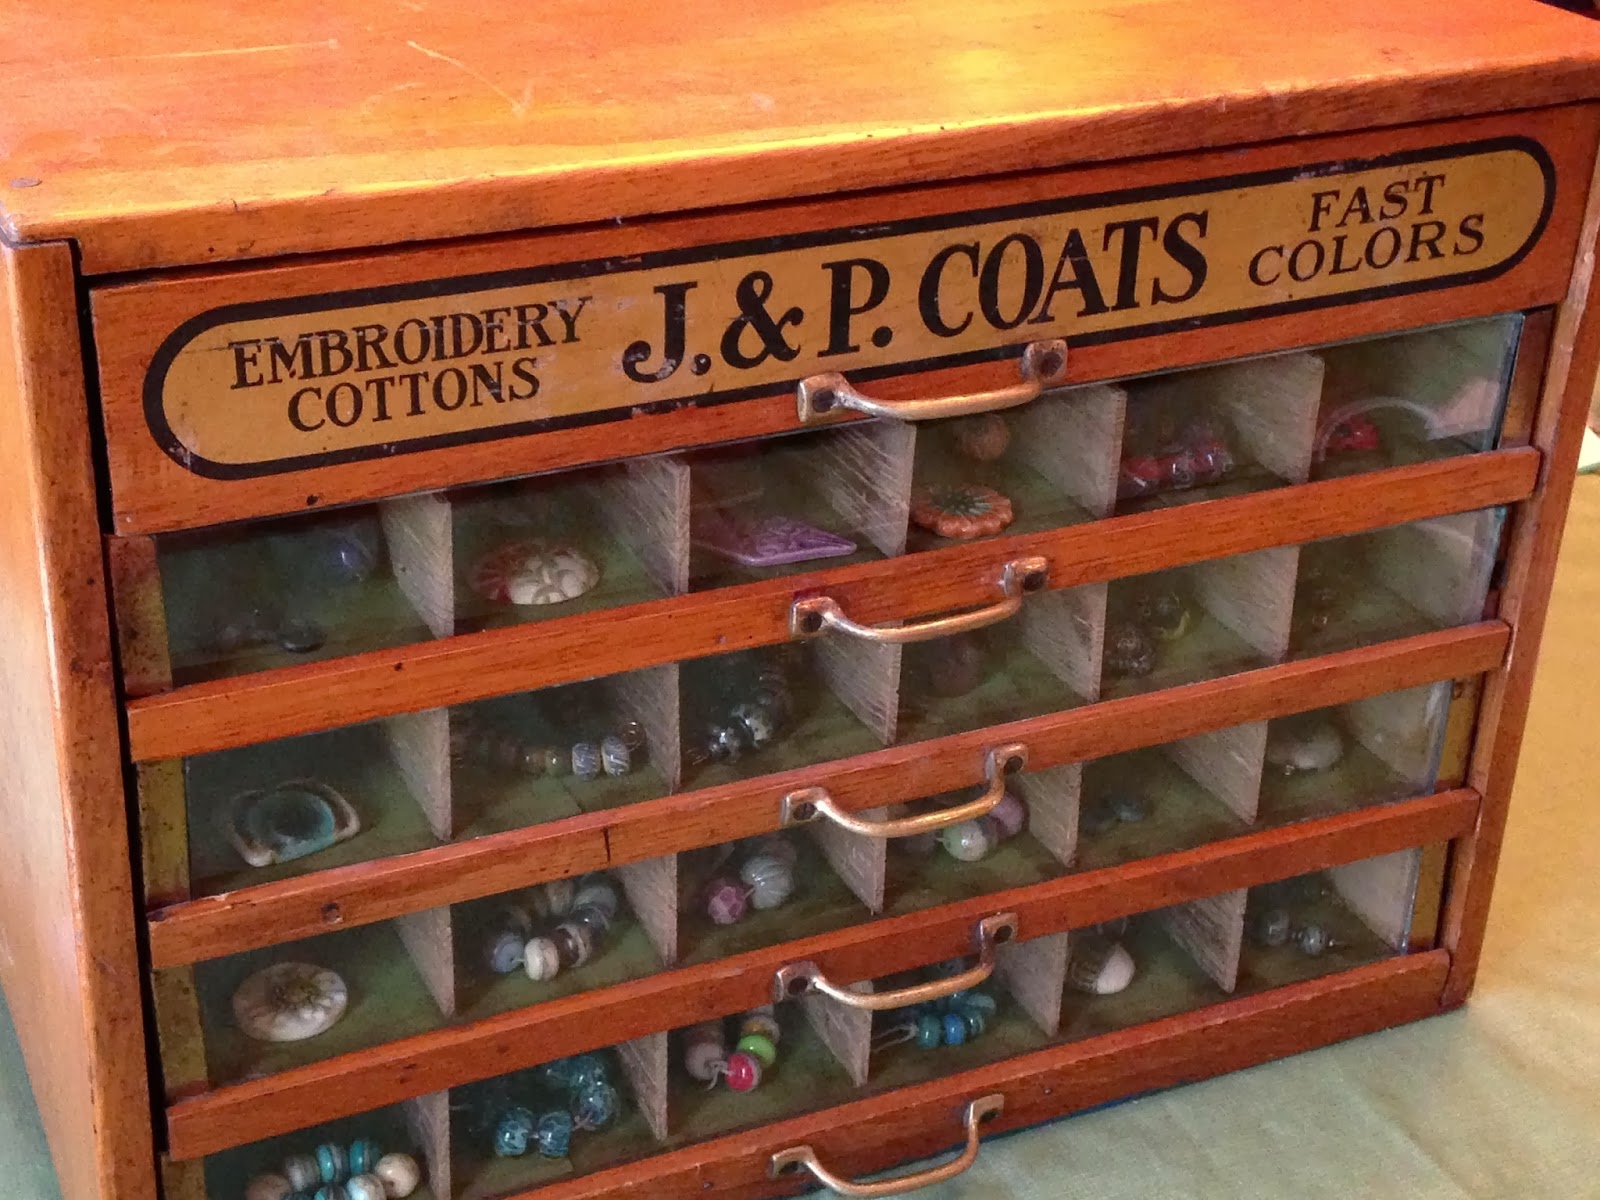
It's a old counter display for J&P Coats embroidery floss. Back in my short-lived cross stitching days, I had plenty of Coats and Clark floss (they merged in the 1950's) so it felt a little nostalgic for me. Near as I can determine, it's from the 1920's or 30's and is in relatively good shape all things considered. I'm proud of myself for asking the shop clerk if they could do better than the listed price and was rewarded by getting the thing for $95 less than it was listed for (and more than $100 less than some I saw online after a little digging... score!).
Anyway, we picked up my new treasure on our way out of town and I started plotting the mostly cosmetic work that would make it my fabulous new art bead storage unit. Here are a few more "before" pictures:

 |
| This is probably the drawer that was in the best shape to start. |
 |
| It was a whole rainbow of velvet paper! |
The insides of the drawers were coated in some sort of paper that had been glued down at some point in its life. I seriously underestimated the amount of effort that would go into getting back down to the wood! I tried a few different things with little success including a misguided attempt to sand them by hand. Thank goodness for our friend Marty who lent me his little orbital sander and taught me how to use it! I eventually learned that trying to peel up as much of the paper as possible before sanding was the best route.
After getting it all sanded down as best I could, it still took me a while to find the time to clean all the sawdust out of the drawers and get the paper stuck down in each one. The scrapbook paper isn't big enough to cover the whole drawer so I had to cut and piece things together. It's not perfect, but I think it works pretty well. Marty came to my rescue again by making me new dividers for the drawers since the ones that came with it weren't anything special (some were old rulers that someone cut to fit) and they were covered with more of that glued on paper, masking tape, and stickers... not worth the time trying to clean up! He used some really cool white oak planks that had been salvaged from an old granary in Winona, MN. The wood dates back to at least 1908 and has some wormwood that gives it great character.

So, finally after more than half a year, I have a lovely new storage piece for my art beads. Now to get down to business and get my beads all organized inside it!
That is one cool storage case!
ReplyDeleteLove it!! What a lucky find :)
ReplyDeleteAwesome!
ReplyDeleteBeautiful and very fitting of all the loveliness inside. I do have a massive 20 drawer one that indeed I did find room for. You should have seen the state of my garage as I striped, sanded, stained and finally varathaned (x3!) and vacuuming out the 20x96 compartments was a tad tedious ;)
ReplyDeleteOh I so enjoyed this post....from discovering this amazing spool cabinet to the labor of love getting it all cleaned up and ready to use.... I'm an antiques lover and as much as I like finding cabinets (I have a mini collection), I really do not like the process of trying to clean out the drawers. I have a drawer unit that belonged in an old pharmacy in Baltimore that has divided spaces in some of the drawers and I have yet to tackle it. A vacuum with an attachment might be the way to go. Your spool cabinet is just so perfect for bead storage, especially with the glass front drawers - now your special art beads won't be hidden away!
ReplyDeleteYour new storage pieces is wonderful. Isn't Duluth fun to visit?
ReplyDeleteOh, wonderful! What a treasure.
ReplyDelete