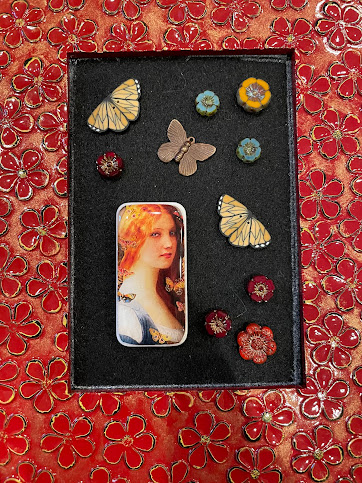
I've been toying with the idea of doing a small, framed art piece that's bead embroidered for some time. This winter I began the process of giving it a shot. After the rush of holiday markets and gift making, it was nice to just sit back with a relaxing project with no firm deadline looming... something that I realized might end up just being for me. I'd love to share a bit of that journey with you!
It all started with a frame that I've had for about 24 years that I never actually used for photos. I loved the floral textured look to it and felt like it would be a whimsical addition to my first attempt at bead embroidered art. I pulled out my supplies and got to work!
I used the original glass to measure the size of the bead foundation and then used my white gel pen to trace the frame's opening that would be my canvas.

Once I got my cabochon bezeled, I picked out some coordinating crystal cup chain to go around the bezel. I love the effect but am no pro at getting cup chain to behave nicely! With that corner of the piece done, it was time to get serious about the placement of my other larger elements. I positioned things again and got it all glued down with some E6000. Next, to create a little movement across the piece, I sketched in some swirls that began at the little gap left between the two ends of the cup chain. I then used gold size 15 seed beads along those swirls.
Overall, I'm really proud of the outcome and look forward to trying my hand at some more framed pieces in the near future. It's fun to break out of your normal routine and try something totally new! Is there something you've been wanting to try? I encourage you to get out there and do it!


Wow, Sarajo! Your bead embroidered art jewelry pieces are absolutely stunning! 😍 I love how you've incorporated those beautiful lampwork beads into your designs. The colors and textures are so rich and vibrant. It's amazing to see how you've transformed simple components into such intricate and eye-catching works of art. Your creativity never ceases to amaze me! 😊 Keep up the fantastic work! 💖
ReplyDelete